Saturday, August 31, 2013

Chevron Scarf Pattern

A reader requested the pattern for the chevron scarf that I'm still working on


So here it is

Materials
Size G or H crochet hook (the H hook will make a looser and wider scarf)
worsted weight yarn
Yarn needle

Pattern

Ch 38

Row 1: Dc in 4th ch from hook. Dc in next 7 chs. Skip next 2 chs, dc in next 7 chs. (dc, ch 1, dc) in next ch, dc in next 7 chs. Skip next 2 chains, dc in next 7 chs, 2 dc in last ch. Turn.

Row 2: Ch 3 (counts as a dc). Dc in first st. Dc in next 7 sts, skip 2 sts, dc in next 7 sts, (dc, ch 1, dc) in next st (which will be the ch 1 sp), dc in next 7 sts, skip 2 sts, dc in next 7 sts. 2 dc in last st (which is the ch 3 from the previous row) Turn. 

Repeat row 2 until you reach desired length for scarf.

Weave all ends.


My progress so far... you can add as many colors and rows as you would like.


Here's another colorful WIP...it's a stripey bag for the craft fair


Have a great weekend!

Sunday, August 25, 2013

Basket Burnout

I have made three more this week... I'm burn out


A few crocheters have asked me if it would make a big difference if they used an M or N hook instead of the L hook that I prefer. 

So here are the results...


The smaller one on the left was made with an L hook
The middle one with an M hook, and
The one on the right with an N hook


You can really see the difference above. N hook vs L hook. I still prefer the L. The smaller basket is so firm and does not sag or move. It is so tight it could almost stand on its handles (I'm exaggerating a little)

I just don't like how the other two have to be shaped to look the way they do in the photos...so this is why I recommend the L hook.


I made this one a little different. I used an N hook and added 6 more stitches in the body to make the shape more oval.


One more shot of all four


One more note:
To answer another question...when crocheting in the round such as these baskets or hats, always remember there is a right side and a wrong side. It is easy to have a basket or hat turn inside out when making it. Notice the difference in the look of the stitches. 
As you crochet, remember that your stitches will always be facing you when on the right side.

Many baskets I have seen posted are actually turned wrong side out. If you look at the second photo in this post, you can see the difference in the inside of the basket and the outside. When finished, the top of the stitches of the last round should be facing out, not in. This is how you can tell if you have accidentally turned the basket inside out.

Hope this helps answer some questions:)

Wednesday, August 21, 2013

My Favorite Basket... So Far


I made this basket last night sitting in front of the tv. I think it's my favorite one yet. It's another chunky crochet basket. The color is perfect. 

I used Lion Brand Thick and Quick in Oatmeal. It took every bit of 2 skeins with an N hook. The size is a larger (7 inches in height and 10 inches in diameter) since I used a larger hook. This particular color of yarn seems to be thicker than other colors of the same brand. 

I think I'll make 2 or 3 more just like this for the craft fair.

Saturday, August 17, 2013

Chunky Crocheted Tote Pattern


I made this bag in one day. I love instant gratification projects. I'm going to make about 3 more. They're so easy and take very little brain power...my kind of project.


Materials
Super Bulky yarn (2-2.5 skeins) I used Lion Brand Thick and Quick in charcoal
Size K and L crochet hooks
Yarn needle

Measurements
14 inches (36mm) in height
20 inches (51mm) in height (including handles)
15 inches (38mm) in width (lying flat)

Note
The bottom of the bag is worked in rows, forming a square

Pattern

With K hook Ch 17

Row 1: Sc in 2nd ch from hook, sc in each ch to the end. (16 sc)
Rows 2-17: Ch 1, sc in each st across. (16 sc)

You will now begin working in the round. Do not turn your work

Round 1: Working down the side, place sc in the ends of each row. I put 2 sc in each corner. Work sc across the row, then back up the other side of the work. Place sc in each st across the top. You should end with 68 sc. 
Rnd 2: Working in the back loop, place sc in each st around. Do not join. Do not turn.
Now switch to the L hook
Rnd 3-31: Working in both loops, sc in each st around.

To determine where to end, I layed the work flat and lined up the corner of the bottom


The next round will form the handles

Rnd 32: Ch 35, skip the next 17 sts, sc in the next 17 sts, ch 35, skip 17 sts, sc in next 17 sts. Do not join.


Rnd 33: Sc in back ridge of each ch, sc in next 17 sts, sc in back ridge of each ch, sc in next 17 sts. Join using invisible join method.

Weave all of the ends...and you're done.


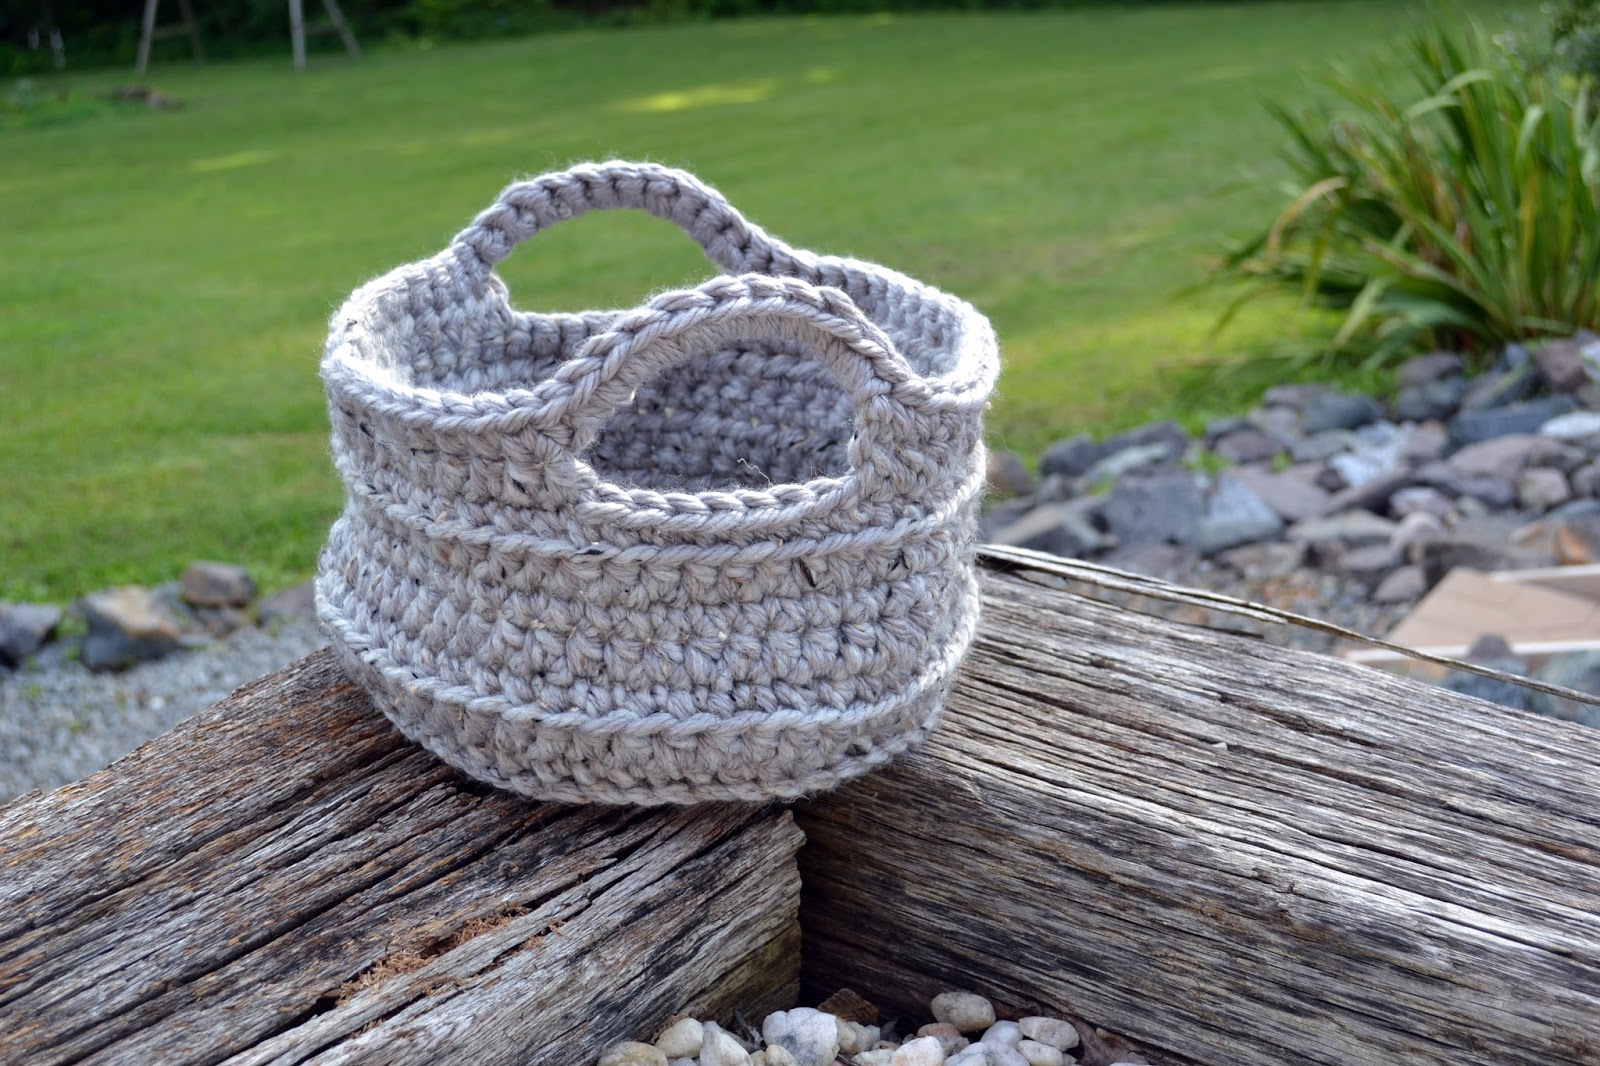
I like the shape of the bottom because the shape of the bag changes depending on how much stuff you put in the bag. It can be oval, round, or square.

It's so easy to make the size larger. All you do is add more rows. To add to the width just make the bottom larger by adding stitches and rows. Just make sure if you expand the pattern, increase the stitch count in between the handles. Just play around with it, and don't fret, crochet is so easy to rip out and redo. This bag is so quick, messing up won't slow you down much at all.

Remember to line up your handles so they are centered with the bottom. (look at the photo above)

Please let me know if you have any questions, or if I need to correct any typos or mistakes.
(I wrote this up fast)

Have a great weekend!

Friday, August 16, 2013

Chunky Crocheted Tote

Here's my latest project


I am trying to make a bunch of quick and easy items for an upcoming craft fair. I plan to make several of these in different colors.

And here's my little Ellie kitty watching me take the pics


Tomorrow I'll post the pattern with more photos

Good night:)

Sunday, August 4, 2013

Hexagon Pattern

I have at least a half a dozen projects going on. Since I have crochet ADD, I decided to start another one. I love hexagons and decided to come up with my own pattern.


Each one only takes a tiny amount of yarn, so I can use all of these little balls


Materials
Yarn of your choice (I used worsted weight)
Size G (4mm) hook
Yarn needle to weave ends

Measurements
about 3.25 to 3.5 inches (depending on your tension)

Pattern (US terminology)

Ch 4, Join with sl st, forming a ring

Round 1: Ch 3 (counts as first dc), 11 Dc into the ring. Make sure you crochet over the beginning tail. Join with sl st into top of first st. Pull tail tightly to close the hole. (12 dc)

Round 2: Ch 3, dc in same st, ch 1, (2 dc in next st, ch 1) around. Join with sl st to top of first st. (24 dc and 12 ch-1 spaces)

Round 3: Sl st over to the first ch-1 sp. Ch 3, dc in same sp, ch 3, 2 dc in same sp. 2 dc in next ch sp. (2 dc, ch 3, 2 dc in next ch-1 sp, 2 dc in next ch sp) around. Join with sl st. Sl st over to ch-3 space. (this will set you up to sew hexagons together). Cut tail leaving several inches for sewing. 

When sewing together, whipstitch into the back loops of the hexagon. Sew from point to point. (This will be 10 stitches)


I like to use the tails of the work for sewing. Make sure after whipstitching together, you weave at least 3 inches into your work to secure the ends.

Just a note: This is a really simple pattern, not complex at all, so if there is another out there like this one or similar...it is purely coincidental. 

If you have questions feel free to ask. I'll try to answer them.
Have a great weekend!

Saturday, August 3, 2013

Hexagons and More

I am loving hexagons right now.


This is not a very good photo but I'll post more when I post the pattern. 

I've also been working on more baskets


I may be doing a craft fair, so I'm going to get busy making more of these in different colors.

We came back from the beach a few days ago and I thought I would share some pics. We had a really good time.


When I get motivated I'll sit down and write up the hexagon pattern

I'll be back :)